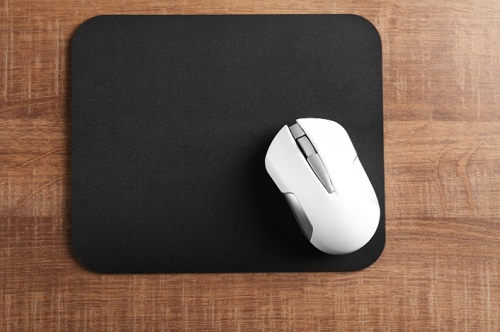
Adding a wireless mouse to your setup can improve both your productivity and comfort. Whether you’re setting it up for a desktop, laptop, or even a tablet, the wireless mouse offers a convenient, clutter-free experience. In this guide, we’ll walk you through the entire process of adding a wireless mouse, whether it’s a USB-based or Bluetooth model. We’ll also cover common issues and FAQs to ensure a smooth setup.

What Is a Wireless Mouse and Why Should You Use One?
A wireless mouse eliminates the need for cables by using either a USB receiver or Bluetooth to connect to your device. Here’s why many users opt for wireless over traditional wired mice:
Wireless mice come in two main types: USB receiver-based and Bluetooth-based. The connection method you choose depends on your device’s compatibility and your personal preference.
How to Add a Wireless Mouse with a USB Receiver
USB wireless mice are the most common and often the easiest to set up. They come with a small USB receiver that plugs into your device. Here’s how to add a wireless mouse using a USB receiver:
Make sure the mouse is powered up by installing the necessary batteries or charging it. Many wireless mice come with AA or AAA batteries, while others are rechargeable.
Insert the receiver into an available USB port on your computer. If your computer lacks enough USB ports, you might need to use a USB hub.
There’s usually a small switch underneath the mouse. Flip it to the “on” position. Some mice may have a light that indicates they are powered on and ready for pairing.
Your device should recognize the new USB receiver and pair automatically with the mouse. Windows, macOS, and most modern operating systems will install the required drivers automatically.
Move the mouse to check if the cursor responds on your screen. If it doesn’t work right away, try removing the USB receiver and re-plugging it or restart your computer.
How to Add a Wireless Mouse via Bluetooth
Bluetooth wireless mice offer more flexibility since they don’t require a USB port, making them perfect for devices with limited USB slots, like modern laptops and tablets. Here’s how to pair your Bluetooth mouse:
Ensure the mouse is powered on and switch it into pairing mode. Most Bluetooth mice have a dedicated button that activates pairing.
On Windows: Go to “Settings” > “Devices” > “Bluetooth & other devices” and turn Bluetooth on.
On macOS: Open “System Preferences,” select “Bluetooth,” and ensure it is enabled.
In your device’s Bluetooth menu, select “Add a Bluetooth device.” Your mouse should appear in the list of available devices. Select it, and follow any prompts to complete the pairing.
Move the mouse to ensure the cursor responds. If the mouse doesn’t show up in the Bluetooth menu or fails to connect, turn the mouse off and on, and repeat the pairing process.
Common Problems When Adding a Wireless Mouse and How to Fix Them
Though adding a wireless mouse is usually simple, some common issues may arise:
Ensure the USB receiver is firmly plugged into the port. Try switching to another USB port or restarting your device. For Bluetooth mice, make sure Bluetooth is enabled, and the mouse is in pairing mode.
Wireless mice can experience lag due to low battery. Replace the batteries or recharge the mouse. For Bluetooth mice, make sure they are within range (usually 10 meters or less).
Sometimes, USB receivers can experience interference from nearby devices. Try repositioning the receiver or reducing the number of wireless devices in the area.
For USB mice, ensure the receiver is not obstructed. For Bluetooth mice, ensure your computer’s Bluetooth drivers are up to date. It might also help to remove other Bluetooth devices that could be causing interference.
Conclusion
Adding a wireless mouse to your device, whether via a USB receiver or Bluetooth, is an easy way to improve your overall user experience. These devices offer convenience, flexibility, and a cleaner workspace, all while enhancing your productivity. Whether you’re using a wireless mouse for work or play, understanding the setup process and troubleshooting common issues will ensure a smooth connection every time.
FAQs
Why won’t my wireless mouse connect to my computer?
If your wireless mouse isn’t connecting, check to make sure the battery is charged or replaced. For USB models, try a different port or restart your computer. For Bluetooth mice, make sure Bluetooth is turned on, and the mouse is in pairing mode.
Can I add a wireless mouse to multiple devices?
Yes, many Bluetooth wireless mice can pair with multiple devices. Some models even have dedicated buttons that allow you to switch between connected devices. However, USB receiver mice are typically limited to one device at a time.
Do I need special software to add a wireless mouse?
In most cases, no. USB wireless mice will install necessary drivers automatically. Bluetooth mice may require pairing through your device’s settings, but no additional software is usually required. However, for advanced functions, some brands offer optional software for customization.
