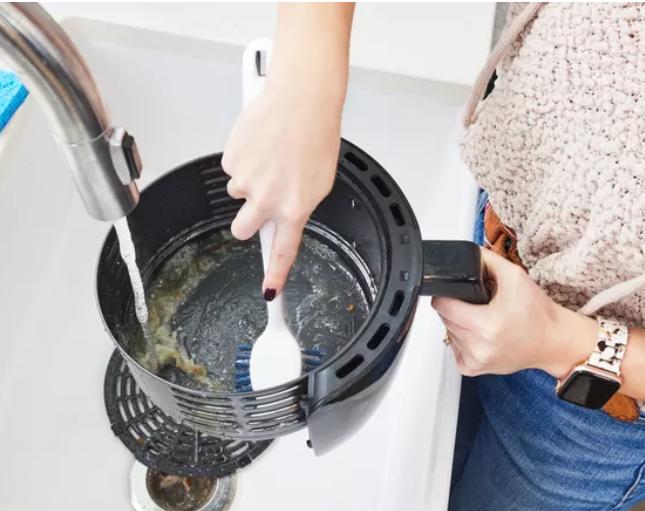
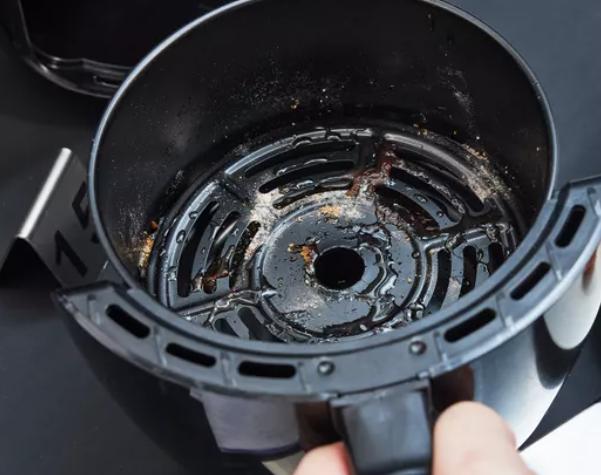
Cleaning your air fryer regularly is essential to keep it in top condition and ensure your food remains safe and delicious. Knowing how to clean your air fryer thoroughly can extend its life and maintain its performance. This guide will walk you through the steps needed how to clean air fryer after every use and perform a deep clean to tackle stubborn grease and grime. Let’s dive in and make your air fryer sparkle.

Why Should You Clean Your Air Fryer Regularly?
Health and Safety Benefits
Regular cleaning of your air fryer prevents the buildup of food residue, which can harbor bacteria and mold. These contaminants can cause foodborne illnesses and unpleasant odors. By cleaning your air fryer after each use, you ensure that every meal is cooked in a safe and hygienic environment. Additionally, a clean air fryer reduces the risk of smoke and burning, which can occur when old food particles are left to accumulate.
Moreover, a dirty air fryer can lead to cross-contamination of flavors, making your food taste less fresh. Keeping the appliance clean ensures that each dish retains its intended flavor without being tainted by remnants of previous meals. This is particularly important when cooking different types of food in succession. Cleanliness also extends to preventing pest infestations, as leftover food particles can attract unwanted insects or rodents.
Maintaining Performance
A clean air fryer operates more efficiently. Grease and food particles can clog the heating elements and air vents, reducing airflow and causing uneven cooking. Regular cleaning helps maintain optimal performance, ensuring your food cooks evenly and quickly. It also prolongs the life of your air fryer, as the components are less likely to suffer from wear and tear caused by built-up debris.
When the heating element and air vents are free from obstruction, the air fryer can maintain consistent temperatures, leading to better-cooked meals. This consistency is crucial for recipes that require precise cooking conditions. Additionally, regular maintenance can prevent mechanical failures, saving you from costly repairs or replacements. Overall, a well-maintained air fryer delivers better results and a more enjoyable cooking experience.
What Tools and Supplies Do You Need to Clean an Air Fryer?
Basic Cleaning Supplies
To clean your air fryer, you’ll need a few basic supplies: mild dish soap, a soft sponge or cloth, and warm water. Avoid abrasive cleaners or scouring pads, as they can damage the non-stick coating. A soft-bristled brush can help remove food particles from hard-to-reach areas. Paper towels or a microfiber cloth are also useful for drying and polishing the exterior.
Mild dish soap is effective at cutting through grease without being harsh on the air fryer’s surfaces. A soft sponge or cloth ensures that you can clean thoroughly without scratching or damaging the appliance. Warm water helps to loosen and dissolve food residues, making the cleaning process more efficient. Additionally, having paper towels or a microfiber cloth on hand allows for a streak-free finish on the exterior, keeping your air fryer looking new.
Specialized Cleaning Tools
For a deeper clean, consider using specialized tools. A small, soft-bristled brush can clean the heating element without causing damage. A toothbrush can help scrub stubborn spots in the basket and pan. If your air fryer has a lot of baked-on grease, a non-toxic degreaser spray can break down the buildup. Ensure you use tools that won’t scratch or damage the air fryer’s surfaces.
A soft-bristled brush is particularly useful for getting into tight spaces and cleaning the heating element gently. A toothbrush, with its small head and firm bristles, is excellent for scrubbing away tough, stuck-on food particles in the basket and pan. A non-toxic degreaser spray can be a game-changer for tackling stubborn grease without exposing your appliance to harsh chemicals. Always ensure that these tools are used carefully to avoid damaging the non-stick surfaces or the electrical components of the air fryer.
Deep Cleaning Your Air Fryer: A Step-by-Step Guide
Disassembling the Air Fryer
Start by unplugging the air fryer and letting it cool completely. Remove all detachable parts, such as the basket, pan, and any accessories. Check the manufacturer’s instructions to ensure you’re not disassembling components that shouldn’t be removed. Lay out the parts on a clean, dry towel. This step makes it easier to clean each component thoroughly and prevents damage from improper handling.
Disassembling your air fryer allows you to access and clean parts that are often neglected during regular cleanings. By laying out the parts on a clean towel, you keep them organized and avoid losing small components. It’s crucial to refer to the manufacturer’s instructions to avoid damaging parts that are not meant to be removed. This thorough approach ensures every part of the air fryer is cleaned, contributing to better performance and longevity of the appliance.

Cleaning the Heating Element
Use a soft-bristled brush to gently clean the heating element. Avoid using water directly on the heating element, as it can cause damage. Instead, dampen the brush slightly and scrub away any food particles or grease. If the heating element is particularly dirty, use a non-toxic degreaser spray to help break down the grime. Wipe away any residue with a dry cloth, ensuring the element is completely dry before reassembling the air fryer.
Cleaning the heating element is crucial for maintaining the efficiency and safety of your air fryer. A soft-bristled brush helps remove buildup without damaging the delicate components. Avoiding direct water contact prevents potential electrical issues. Using a non-toxic degreaser ensures that the element is thoroughly cleaned without leaving harmful residues. Ensuring the element is completely dry before reassembly is vital to prevent any electrical hazards when you next use the air fryer.
Reassembling and Final Touches
Once all parts are clean and dry, reassemble the air fryer. Ensure each component is securely in place. Wipe down the exterior once more to remove any smudges or fingerprints from handling. Plug in the air fryer and run it for a few minutes without food to ensure everything is working correctly. A deep clean not only makes your air fryer look new but also ensures it operates at peak performance.
Reassembling the air fryer carefully ensures that it is ready for use without any issues. Running the air fryer for a few minutes without food allows you to confirm that all components are functioning correctly. This step is particularly important if you used any cleaning agents that might need to be burned off before cooking. A final wipe down of the exterior keeps the appliance looking pristine, ready for its next use, and adds to the satisfaction of having a thoroughly cleaned kitchen gadget.
Conclusion
Learning how to clean air fryer thoroughly is crucial for maintaining its efficiency and ensuring your food stays safe and tasty. Regular cleaning prevents the buildup of harmful bacteria and keeps your appliance running smoothly. By following the steps outlined in this guide, you can keep your air fryer in excellent condition for years to come. Remember, a clean air fryer is a happy air fryer, making your cooking experience more enjoyable and your meals healthier.
Maintaining a clean air fryer enhances its performance and extends its lifespan, making it a reliable kitchen companion. These cleaning steps are simple yet effective, ensuring that your appliance remains in top condition. Prioritizing cleanliness not only protects your health but also preserves the quality of your food. Implement these practices regularly, and you’ll enjoy the benefits of a well-maintained air fryer that delivers delicious, perfectly cooked meals every time.
FAQs
1: How often should I deep clean my air fryer?
For optimal performance, deep clean your air fryer once a month or more frequently if you use it often. Regular deep cleaning prevents grease buildup and maintains hygiene. By consistently deep cleaning, you ensure that the appliance operates efficiently, reducing the risk of smoke and unpleasant odors caused by accumulated food particles.
2: Can I put air fryer parts in the dishwasher?
Many air fryer parts are dishwasher safe, including the basket and pan. Check the manufacturer’s instructions to confirm. Hand washing is gentler and can prolong the lifespan of the components. Always follow the manufacturer’s guidelines to avoid damaging non-dishwasher-safe parts, ensuring that your air fryer components remain in excellent condition.
3: What should I avoid when cleaning my air fryer?
Avoid using abrasive cleaners or scouring pads, as they can damage the non-stick coating. Also, do not submerge the main unit in water or use water directly on the heating element. Use only mild cleaners and soft tools to maintain the integrity of your air fryer. This careful approach ensures the appliance remains in top shape and functions efficiently.
