Deflating a basketball might seem straightforward, but doing it correctly is essential to prevent damage. Whether you need to pack your basketball for travel, store it for the offseason, or simply reduce the pressure for specific drills, proper deflation ensures the ball’s longevity and performance. Incorrect methods can puncture the ball or cause uneven deflation, leading to an awkward bounce or a damaged outer layer. This guide will walk you through safe and effective techniques for how to deflate a basketball using the right tools and steps to keep your ball in prime condition. Whether you’re a coach, player, or just a basketball enthusiast, understanding how to deflate a basketball without causing harm is a valuable skill. Let’s get started with why proper deflation is so important.

Why Is Proper Deflation Important?
Proper deflation of a basketball is crucial for maintaining the ball’s integrity and usability. When a basketball is deflated correctly, it prevents damage to the internal bladder, which can compromise the ball’s bounce and overall performance. Over-inflation or uneven deflation can lead to stress on the seams and outer layer, causing cracks or splits over time. Additionally, correctly deflated basketballs are easier to store and transport, reducing the risk of them becoming misshapen. If you plan to keep your basketball in storage for an extended period, ensuring it’s deflated properly will protect it from damage caused by fluctuating temperatures or pressure changes. Proper deflation also allows for controlled air release, ensuring that the ball remains balanced and in good shape for when you’re ready to use it again.
What Tools Do You Need to Safely Deflate a Basketball?
To safely deflate a basketball, you need the right tools to avoid damaging the ball. The most common tool is an inflation needle, which is typically included with most air pumps. This needle is designed to fit into the valve of the basketball and allows air to be released slowly and evenly. Alternatively, a paper clip or a similar thin object can be used in place of a needle, though this method requires more caution to prevent puncturing the ball. A manual or electric air pump with a deflation setting can also be handy, as it controls the air release more precisely. Having these tools on hand ensures you can safely deflate your basketball without causing any damage.
Step-by-Step Guide: How to Deflate a Basketball Safely
Step 1: Insert the Needle into the Valve
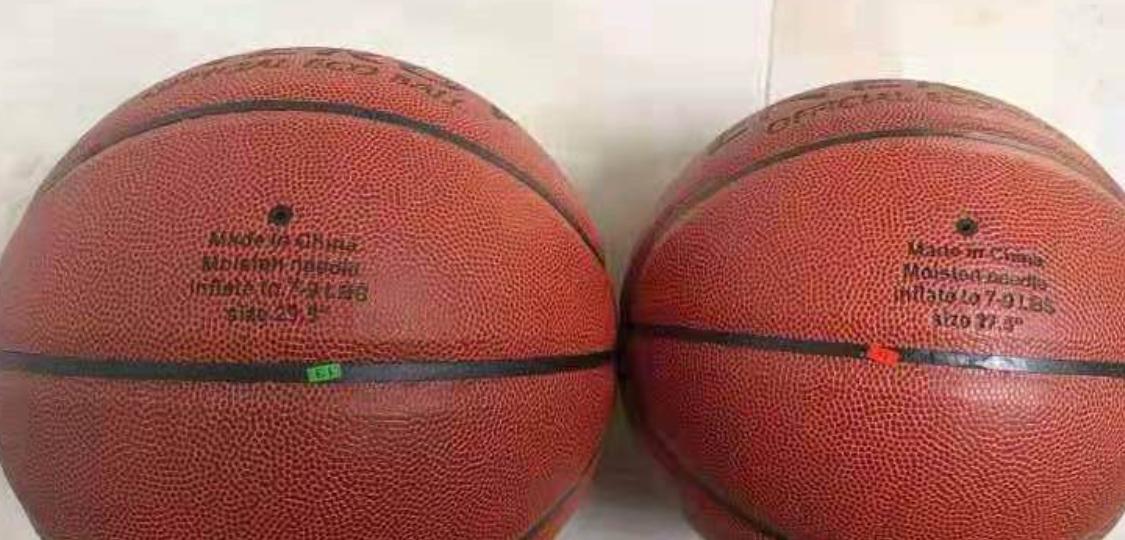
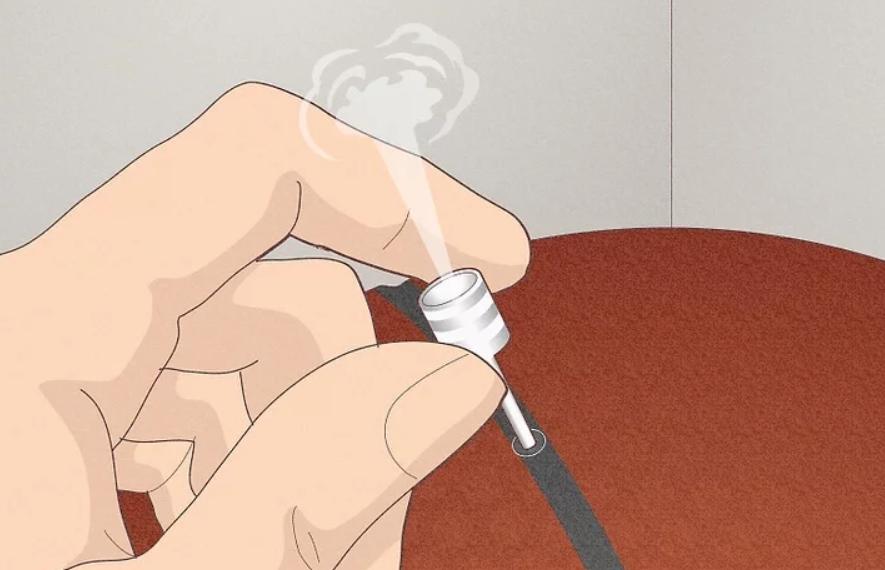
Start by locating the valve of your basketball, usually marked with a small black circle. Take an inflation needle and carefully insert it into the valve. It’s important to insert the needle straight and gently to avoid damaging the valve or the bladder inside the ball. If you feel resistance, stop and reposition the needle to prevent puncturing the inner bladder. Once the needle is securely in place, you can begin the deflation process. This first step is crucial as improper insertion can lead to irreversible damage, rendering the basketball unusable. Make sure to use a clean and undamaged needle to avoid introducing debris into the valve.
Step 2: Release the Air Slowly
With the needle securely in the valve, begin to release the air by either manually pressing on the basketball or allowing it to deflate naturally. It’s important to release the air slowly to avoid stressing the ball’s seams or causing the outer layer to crack. If you’re using an air pump, set it to deflate mode, which will control the air release for you. This process should take a few minutes, allowing the ball to gradually lose pressure. Rushing this step could cause the ball to become lopsided or lead to damage that affects its bounce. Patience is key to ensuring that the basketball is deflated safely and evenly.

Step 3: Monitor the Deflation Process
As the air escapes, monitor the basketball to ensure it’s deflating evenly. Gently press on the ball to help release the remaining air, checking to see that the surface stays smooth and free of wrinkles. If you notice any irregularities, stop and readjust the needle to ensure air is escaping properly. It’s essential to keep an eye on the overall shape of the basketball as it deflates. This step ensures that the deflation is happening uniformly and that the ball’s structure isn’t being compromised. By carefully monitoring the process, you prevent damage and ensure that your basketball remains in good condition for future use.
Step 4: Remove the Needle Carefully
Once the basketball is fully deflated, carefully remove the needle from the valve. This step is crucial as improper removal can damage the valve, leading to air leaks in the future. Hold the basketball steady with one hand while gently pulling the needle out with the other. Make sure to remove the needle straight out, avoiding any twisting or forceful movements that could tear the valve. After the needle is removed, store it in a safe place to prevent any damage or dirt accumulation. Properly removing the needle ensures that the basketball’s valve remains intact, preserving its ability to hold air when you reinflate it.
Step 5: Store the Deflated Basketball Properly
After deflation, store your basketball in a cool, dry place to maintain its condition. Avoid placing heavy objects on top of the ball, as this can deform it, even when deflated. If you plan to store it for a long period, consider wrapping it in a cloth or placing it in a protective case to prevent dust and debris from accumulating on the surface. Proper storage will ensure that your basketball remains in good shape and is ready to be reinflated and used whenever needed. By taking these precautions, you extend the lifespan of your basketball and ensure it stays in optimal condition for future games.
Common Mistakes to Avoid When Deflating a Basketball
When deflating a basketball, avoid common mistakes like using sharp objects instead of a proper inflation needle, as this can puncture the ball. Another common error is releasing the air too quickly, which can damage the ball’s internal structure or cause it to become misshapen. It’s also important not to press too hard on the ball while deflating it, as excessive pressure can lead to cracks in the outer layer. Additionally, some people forget to monitor the deflation process, leading to uneven air release and potential damage. By being aware of these mistakes and taking the necessary precautions, you can ensure a safe and effective deflation process for your basketball.
Conclusion
How to deflate a basketball without causing damage is a simple but important process. By following the correct steps and using the right tools, you can safely reduce the air pressure in your basketball, making it easier to store or transport. Remember to insert the needle carefully, release the air slowly, and monitor the deflation process to avoid any potential damage. Proper storage after deflation will further protect your basketball, ensuring it stays in good condition for when you need it next. With these easy steps, you can maintain the longevity and performance of your basketball, avoiding the common pitfalls that can lead to damage.
FAQ
Can You Deflate a Basketball Without a Needle?
Yes, it is possible to deflate a basketball without a needle, but it requires extra caution. You can use a thin object like a paper clip or a small, non-sharp tool to press the valve and release the air. However, this method increases the risk of damaging the valve or puncturing the ball, so it’s recommended only as a last resort.
How Do You Know When a Basketball Is Properly Deflated?
A properly deflated basketball will feel soft to the touch but should not be completely flat. The ball should be flexible enough to be folded slightly without forcing it. Over-deflation can cause the ball to lose its shape, so aim for a balance where the ball is easy to store but still maintains some of its structure.
What Should You Do If the Basketball Doesn’t Deflate Easily?
If your basketball doesn’t deflate easily, double-check that the needle is fully inserted into the valve. If the valve seems blocked, try gently repositioning the needle. If it’s still difficult, there may be an issue with the valve or the ball’s internal structure, in which case it’s best to consult a professional or consider replacing the ball.
