
Draining a water heater is essential for maintaining its efficiency and extending its lifespan. Ignoring this simple maintenance task can lead to sediment buildup, causing issues such as reduced heating efficiency and potential damage to the unit. This guide will provide you with a step-by-step process on how to flush a water heater, ensuring that you can complete the task efficiently and without any hassle.
Why Should You Flush Your Water Heater?
Benefits of Regular Maintenance
Regular maintenance, including flushing your water heater, removes sediment that accumulates over time. This sediment can reduce heating efficiency, leading to higher energy bills. By flushing your water heater, you ensure it operates at peak performance, providing consistent hot water and extending the unit’s lifespan. Regular maintenance also helps prevent unexpected breakdowns, saving you money on costly repairs or replacements.
Signs Your Water Heater Needs Flushing
Certain signs indicate it’s time to flush your water heater. If you notice a metallic taste or smell in your hot water, or if the heater makes rumbling or popping noises, sediment buildup is likely the cause. Additionally, if your hot water takes longer to heat or you see visible sediment in the water, these are clear indicators that your water heater needs flushing. Addressing these signs promptly can prevent further damage and maintain efficient operation.
What Tools and Supplies Do You Need?
Essential Tools
To flush your water heater, gather the necessary tools: a garden hose, a bucket, and a flathead screwdriver. The garden hose will be used to drain the water from the heater, the bucket is for catching any water spills, and the screwdriver will help you open and close valves. Having these tools on hand ensures a smooth and efficient flushing process.
Additional Supplies for Safety
In addition to the essential tools, consider safety supplies such as gloves, safety goggles, and a towel. Gloves protect your hands from hot water and sharp edges, while goggles shield your eyes from potential splashes. A towel helps clean up any spills quickly, preventing slips and falls. These supplies ensure that you can flush your water heater safely and effectively.
How to Flush a Water Heater: Step-by-Step Guide
Preparing Your Water Heater
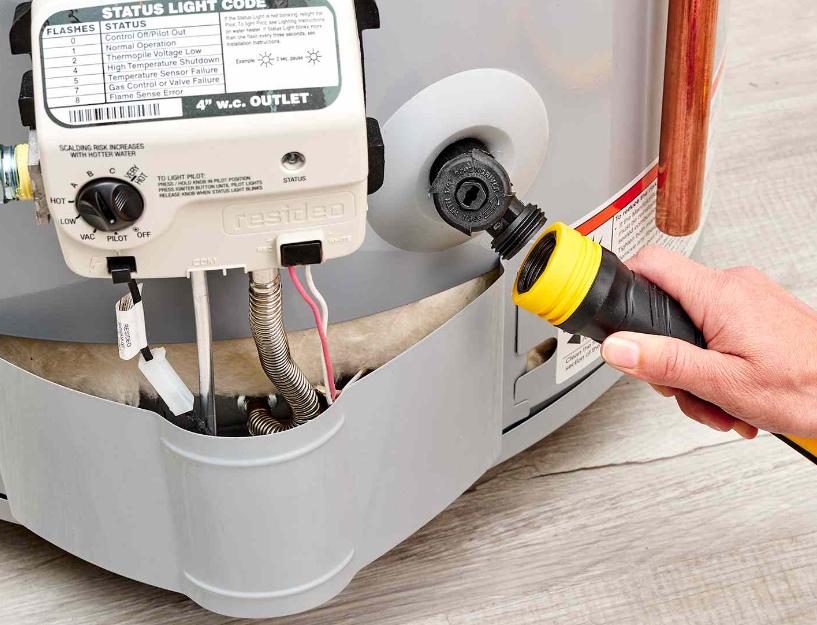
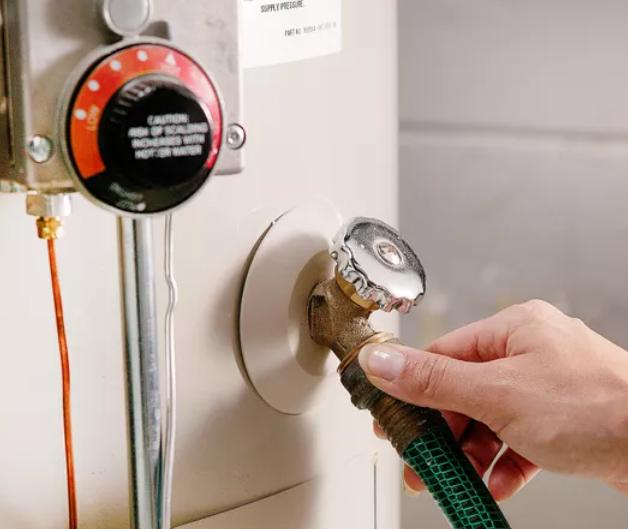
Start by turning off the power supply to the water heater. If you have an electric heater, switch off the circuit breaker. For gas heaters, turn the gas valve to the “pilot” position. Next, turn off the cold water supply to the heater. Attach the garden hose to the drain valve at the bottom of the heater, placing the other end in a bucket or near a floor drain. This setup ensures that water drains safely without causing any damage.
Draining the Tank
Open the drain valve and allow the water to flow out through the hose. To speed up the draining process, open a hot water faucet in your home, which helps release pressure in the system. Be cautious as the water will be hot. Let the water drain completely until it stops flowing. If the water flows slowly or not at all, it may indicate significant sediment buildup, requiring additional steps to clear the blockage.
Flushing and Refilling the Tank
Once the tank is drained, close the drain valve and detach the hose. Turn the cold water supply back on to flush out any remaining sediment. Let the water run for a few minutes, then turn off the cold water supply again. Close the drain valve and refill the tank by turning the cold water supply back on. Once the tank is full, turn the power supply back on for electric heaters or relight the pilot for gas heaters. Check for any leaks and ensure everything is functioning correctly.
What to Do After Flushing Your Water Heater?
After flushing your water heater, inspect the unit for any signs of leaks or damage. Ensure all valves are securely closed and the water supply is functioning correctly. Check the temperature setting on your water heater and adjust it if necessary, typically around 120 degrees Fahrenheit for optimal efficiency and safety. Regularly monitor the heater for any unusual noises or performance issues, addressing them promptly to maintain its efficiency. Keeping a maintenance schedule helps you remember to flush your water heater regularly, ensuring it continues to operate effectively and efficiently.
Conclusion
Knowing how to flush a water heater is crucial for maintaining its efficiency and extending its lifespan. By following this hassle-free guide, you can ensure your water heater operates at peak performance, providing consistent hot water and preventing costly repairs. Regular maintenance, including flushing, is a simple yet effective way to keep your water heater in top condition. Remember to inspect the unit after flushing, adjust the temperature settings, and address any issues promptly. With these steps, you can enjoy reliable hot water and peace of mind.
FAQs
1.How long does it take to flush a water heater?
Flushing a water heater typically takes about 30 minutes to an hour, depending on the size of the tank and the amount of sediment buildup.
2.Can I flush my water heater myself, or should I hire a professional?
You can flush your water heater yourself by following this guide. However, if you’re uncomfortable with the process or encounter issues, it’s best to hire a professional.
3.What should I do if my water heater doesn’t drain properly?
If your water heater doesn’t drain properly, it may indicate significant sediment buildup. Try gently tapping the tank to loosen the sediment or seek professional assistance if the problem persists.