
Installing a tankless water heater can save space and provide a continuous supply of hot water. This guide will walk you through the steps to safely and effectively install a tankless water heater in your home. Whether you’re upgrading from a traditional water heater or setting up a new system, the process can be straightforward with the right tools and preparation. Let’s dive into the essentials needed and the detailed steps to ensure a smooth installation process. By following this guide, you’ll understand how to install a tankless water heater correctly and enjoy its benefits for years to come.
What Are the Essential Tools and Materials Needed?
List of Necessary Tools
Before starting the installation, gather all the necessary tools to ensure a seamless process. You’ll need a pipe cutter, wrench, screwdriver, drill, level, and tape measure. Additionally, a voltage tester is crucial to safely handle electrical connections. Having all these tools at hand will make each step more manageable and reduce interruptions. Ensure each tool is in good working condition to avoid any setbacks during the installation. With these tools ready, you’re prepared to tackle the project effectively.
Required Materials
Alongside tools, specific materials are required for the installation. You’ll need pipe fittings, venting materials, a mounting kit, and appropriate wiring for electrical connections. It’s also essential to have a shutoff valve and gas line fittings if your tankless water heater runs on gas. Ensure you purchase materials compatible with your specific heater model to avoid any installation issues. Having all materials ready and within reach will streamline the installation process and help you avoid last-minute trips to the store.
How to Prepare Your Home for Installation?
Checking Your Home’s Compatibility
Before installing a tankless water heater, assess your home’s compatibility. Check if your home has the necessary electrical capacity and proper ventilation. For gas heaters, ensure your home has a suitable gas line. Verify the space where you plan to install the heater meets the manufacturer’s clearance requirements. Adequate preparation ensures the heater functions correctly and safely. Address any compatibility issues beforehand to prevent complications during the installation process.
Preparing the Installation Area
Prepare the installation area by clearing any obstructions and ensuring easy access to water lines and electrical outlets. Clean the area to avoid any debris interfering with the installation. Mark the spots where you’ll mount the heater and drill holes for secure mounting. Ensure the area is well-ventilated if you’re installing a gas heater. Proper preparation of the installation area sets the foundation for a smooth and efficient installation process.
Step-by-Step Guide to Installing a Tankless Water Heater
Mounting the Heater
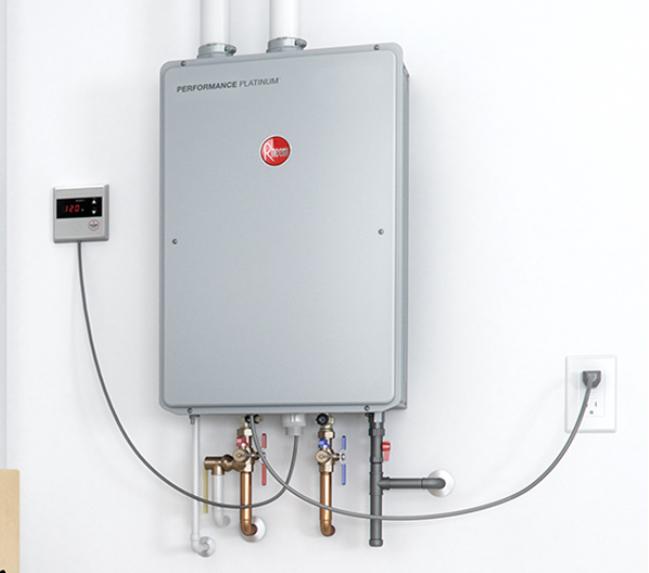
Begin by mounting the tankless water heater securely on the wall. Use a level to ensure it’s perfectly aligned. Follow the manufacturer’s instructions for mounting, which typically involve drilling holes and using mounting brackets. Secure the heater firmly to avoid any movement or vibrations. Double-check the alignment and stability before proceeding to the next steps. Proper mounting is crucial for the safe and efficient operation of your tankless water heater.
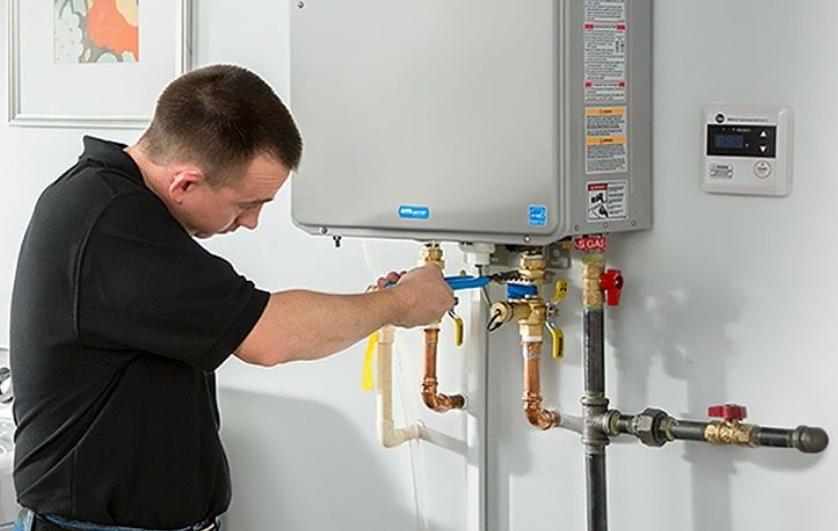
Connecting the Water Lines
Next, connect the cold and hot water lines to the heater. Use appropriate pipe fittings and ensure all connections are tight to prevent leaks. If necessary, use pipe tape to secure the connections. Follow the manufacturer’s instructions for connecting the water lines to avoid any errors. After connecting, turn on the water supply and check for any leaks. Fix any leaks before moving forward to ensure a smooth installation process.
Setting Up the Electrical Connections
For electric tankless water heaters, connect the wiring according to the manufacturer’s instructions. Use a voltage tester to ensure the power is off before making any electrical connections. Connect the heater to a dedicated circuit to avoid overloading. Secure all connections with wire nuts and cover them with electrical tape. Double-check all connections for safety. Once done, turn on the power and test the electrical connections to ensure everything is working correctly.
How to Test Your Tankless Water Heater After Installation?
Checking for Leaks
After installing, it’s crucial to check for any leaks in the water lines. Turn on the water supply and inspect all connections for signs of leakage. Use a dry cloth to wipe around the connections and check for any dampness. If you find any leaks, tighten the connections or apply pipe tape where necessary. Ensuring there are no leaks is vital for the efficient operation of your tankless water heater and prevents potential water damage.
Ensuring Proper Functionality
To ensure your tankless water heater is functioning correctly, turn on a hot water tap and observe the heater’s performance. Check if the water heats up quickly and maintains a consistent temperature. Listen for any unusual noises that might indicate installation issues. Refer to the manufacturer’s troubleshooting guide if you encounter any problems. Proper functionality ensures you enjoy the full benefits of your tankless water heater.
Common Mistakes to Avoid During Installation
Avoid common mistakes during installation to ensure your tankless water heater functions optimally. First, don’t skip reading the manufacturer’s instructions. Each model has specific requirements that must be followed. Ensure all connections are tight and leak-free. Don’t ignore the need for proper ventilation, especially for gas heaters. Incorrect electrical wiring can cause safety hazards, so double-check all connections. Finally, always test the system thoroughly after installation to identify any potential issues early on. By avoiding these mistakes, you can ensure a smooth and safe installation process.
Conclusion
Installing a tankless water heater can be straightforward with proper preparation and attention to detail. By following this guide, you now know how to install a tankless water heater safely and efficiently. Ensure all steps are followed carefully, from gathering tools and materials to checking for leaks and ensuring proper functionality. A successful installation means enjoying endless hot water and increased energy efficiency in your home. Follow these steps to reap the benefits of your new tankless water heater.
FAQ
1.What are the advantages of installing a tankless water heater?
Tankless water heaters provide endless hot water, energy savings, and space efficiency. They heat water on demand, reducing energy waste, and have a longer lifespan compared to traditional water heaters.
2.Can I install a tankless water heater by myself, or do I need a professional?
While DIY installation is possible, it’s recommended to hire a professional if you’re unsure about plumbing or electrical work. Professional installation ensures safety, compliance with local codes, and optimal performance.
3.How often should I maintain my tankless water heater?
Regular maintenance, such as descaling and cleaning the filters, should be done annually. This ensures efficient operation and prolongs the unit’s lifespan. Check the manufacturer’s guidelines for specific maintenance requirements.