Making dog collars for small breeds can be a rewarding experience, giving you control over the comfort and style of your pet’s accessory. Understanding the process is crucial to ensure the collar fits well, is safe, and reflects your dog’s personality. This guide on how to make dog collars will walk you through the necessary steps, tips, and considerations to create the perfect collar for your small breed. Whether you’re an experienced DIY enthusiast or a beginner, these essential tips will help you craft a collar that your dog will love to wear. By using the right materials, focusing on safety, and following a structured approach, you can create a custom collar that meets your small dog’s unique needs. Let’s explore the best ways to make a collar that’s both functional and fashionable.

What Materials Are Best for Making Small Dog Collars?
Choosing the Right Fabric and Hardware
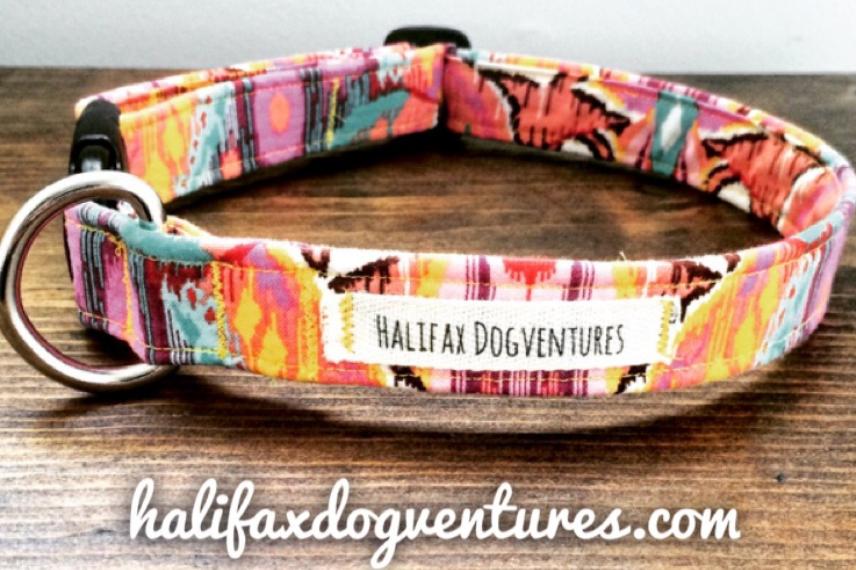
For small dog collars, consider using soft fabrics like nylon or cotton, which are gentle on your dog’s skin but strong enough to withstand daily wear. These materials are lightweight, ensuring that your small dog won’t be burdened by the collar. The choice of hardware is equally important. Opt for lightweight, corrosion-resistant materials such as plastic or lightweight metal for buckles and D-rings. Plastic buckles are particularly suitable for small breeds because they provide secure closure without adding unnecessary weight. The fabric’s pattern and color can also be selected to match your dog’s personality, adding a personal touch to the collar. Overall, the right combination of fabric and hardware will ensure your small dog’s collar is both durable and comfortable, making it perfect for everyday use.
Safety Considerations for Small Breeds
Safety is paramount when making dog collars for small breeds. Due to their size, small dogs are more susceptible to injuries from improperly fitted collars. Ensure the collar is neither too tight nor too loose by following the two-finger rule: you should be able to slip two fingers between the collar and your dog’s neck. Additionally, avoid using materials that might irritate your dog’s skin, such as rough or heavy fabrics. Reflective materials or bright colors can enhance visibility during walks, especially at night or in low-light conditions, providing an extra layer of safety. It’s also wise to include a breakaway feature, especially for smaller dogs who may be more prone to getting their collars caught on objects. This feature allows the collar to release if it gets snagged, preventing choking hazards. By prioritizing safety in your collar design, you ensure your small dog stays comfortable and protected at all times.
How to Make Dog Collars That Fit Comfortably?
Measuring Your Dog’s Neck Accurately
Accurate measurement is crucial for ensuring a comfortable fit when making a dog collar. Start by using a flexible tape measure to measure around your dog’s neck, where the collar will naturally sit. To avoid the collar being too tight, add an extra inch or two to this measurement, depending on your dog’s size. For small breeds, an additional inch is usually sufficient. The collar should sit snugly but allow room for your dog to breathe easily and move comfortably. It’s important to recheck the measurements before cutting any material, as even a small error can result in a poorly fitting collar. Remember, a well-fitted collar not only enhances your dog’s comfort but also reduces the risk of injury, making it essential to get this step right.
Adjusting the Collar for Comfort and Security
Once the collar is assembled, it’s crucial to adjust it properly to ensure both comfort and security. Start by placing the collar around your dog’s neck and adjusting the length until it fits snugly. As a rule of thumb, you should be able to slip two fingers comfortably between the collar and your dog’s neck. This ensures the collar is tight enough to stay secure without restricting your dog’s movement or causing discomfort. After adjusting, observe your dog wearing the collar for a short period to ensure there are no signs of irritation or discomfort. If your dog seems to be scratching at the collar or shows signs of distress, it may need further adjustment. Additionally, regularly check the collar for signs of wear and tear, adjusting as needed to maintain its comfort and safety. Proper adjustment is key to creating a collar that your dog can wear daily without any issues.
Step-by-Step Guide on How to Make Dog Collars for Small Breeds
Gathering Your Tools and Materials
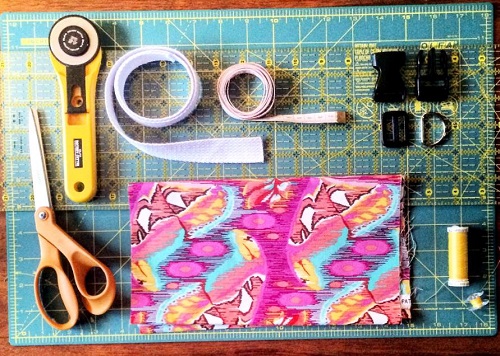
Before you begin making a dog collar, gather all the necessary tools and materials. You’ll need fabric, webbing, a buckle, a D-ring, scissors, and a sewing machine. For small breeds, choose lightweight materials that are both durable and comfortable. The fabric should be soft yet strong, such as nylon or cotton. The webbing provides structure, while the buckle and D-ring allow you to secure the collar and attach a leash or ID tag. Having all materials prepared beforehand ensures a smooth crafting process, allowing you to focus on creating the perfect collar for your small dog. It’s also important to choose tools that are appropriate for the materials you’re working with, such as fabric scissors and a sturdy needle for sewing. Preparation is key to ensuring that your collar is not only functional but also stylish and comfortable for your pet.

Cutting and Assembling the Collar
Begin by cutting the fabric and webbing to the appropriate length based on your dog’s neck measurement. Remember to account for the extra length needed for folding and stitching. Once the materials are cut, start assembling the collar by placing the webbing on top of the fabric, aligning the edges. Pin the pieces together to keep them in place while sewing. Next, sew the fabric and webbing together along the edges, ensuring that the stitches are even and secure. After sewing, trim any excess fabric to keep the collar looking neat and professional. Attach the buckle and D-ring by looping the fabric through and securing it with additional stitching. Make sure the buckle is positioned correctly to allow easy adjustment, and the D-ring is securely attached for leash or ID tag attachment. By following these steps, you can create a durable, well-constructed collar that’s tailored to your small dog’s needs.
Adding Personal Touches and Final Adjustments
Personalizing your dog’s collar adds a unique touch that reflects your dog’s personality. Consider adding embellishments like embroidery, patches, or charms. These can be sewn or attached to the collar to make it stand out. If you’re adding a name tag or contact information, ensure it’s securely fastened and easy to read. After personalizing, make the final adjustments to the collar’s size, ensuring it still fits comfortably and securely on your dog’s neck. Test the collar on your dog, checking for any signs of discomfort or areas that might need further adjustment. Final adjustments might include re-tightening the stitching or trimming any loose threads. These finishing touches not only enhance the collar’s appearance but also ensure it’s fully functional and safe for your dog to wear daily.
Conclusion
Creating a custom dog collar for your small breed is both a fun and rewarding process. By carefully selecting the right materials, focusing on safety, and paying attention to your dog’s unique needs, you can craft a collar that’s perfect for your furry friend. This guide on how to make dog collars has provided you with the essential steps and tips to ensure the collar you create is both comfortable and stylish. Remember, the key to a great collar lies in the details—from accurate measurements to durable materials and thoughtful design choices. Whether you’re making a collar for everyday use or a special occasion, following these steps will help you create a product that you and your dog will both love. So gather your materials, follow this guide, and enjoy the satisfaction of making a collar that’s tailor-made for your small breed dog.
FAQ
1. What materials should I avoid when making dog collars for small breeds?
Avoid heavy materials that can weigh down a small dog and fabrics that may irritate their skin, like rough or stiff materials.
2. How do I ensure the collar is safe and comfortable for my dog?
Ensure the collar fits properly by using the two-finger rule and choosing soft, lightweight materials. Regularly check for wear and tear.
3. Can I use the same method to make collars for larger breeds?
Yes, but adjust the materials and construction to handle the strength and size of larger dogs. Use stronger fabrics and hardware.
