Raising the handlebars on your mountain bike is a crucial adjustment that can significantly improve your riding comfort and control. Whether you’re tackling steep trails or cruising on flat terrain, having the correct handlebar height can reduce strain on your back, neck, and shoulders. Many riders, especially beginners, may not realize how much this simple adjustment can transform their biking experience. Fortunately, you don’t need to be a professional mechanic to make this change. By following a few straightforward steps, you can raise the handlebars on your mountain bike and enjoy a more comfortable, tailored ride. This guide will walk you through everything you need to know how to raise handlebars on mountain bike without professional help.

Why Raise Handlebars on Your Mountain Bike?
Benefits of Raising Handlebars
Raising the handlebars on your mountain bike offers several benefits. It allows you to ride in a more upright position, reducing strain on your lower back, neck, and wrists. This adjustment is particularly beneficial for long rides where comfort is essential. Additionally, a higher handlebar position improves your field of vision, allowing you to see further down the trail. This enhanced visibility can increase safety by giving you more time to react to obstacles. Finally, raising the handlebars can make your bike more responsive, especially on downhill sections, by allowing better weight distribution and control.
When Should You Consider Adjusting Handlebars?
Consider raising the handlebars on your mountain bike if you frequently experience discomfort, such as back, neck, or wrist pain during or after rides. This discomfort often indicates that your handlebars are too low, causing you to lean forward too much. If you’re struggling with control on technical trails, raising the handlebars can provide a more stable and comfortable riding position. Additionally, if you’re transitioning to a different style of riding, such as from aggressive trail riding to more casual or endurance-focused rides, a more upright position may be better suited to your needs.
What Tools Do You Need to Raise Handlebars?
Essential Tools for the Job
To raise the handlebars on your mountain bike, you’ll need a few essential tools. The most important is an Allen wrench or hex key set, which is necessary for loosening and tightening the bolts that secure the handlebars in place. Most bikes use 4mm, 5mm, or 6mm hex bolts, so having a set with multiple sizes is ideal. A torque wrench is also crucial to ensure that you’re tightening the bolts to the manufacturer’s recommended specifications, preventing over-tightening and potential damage. Lastly, a work stand or stable surface to hold your bike in place will make the process easier and safer.
Optional Tools for Enhanced Adjustments
While the essential tools will suffice for raising your handlebars, a few optional tools can make the process smoother and more precise. A stem riser is beneficial if you need a significant increase in handlebar height. This device fits between your bike’s stem and fork, giving you additional height without replacing the stem. A cable tensioner is also useful, as raising the handlebars can affect brake and gear cable tension. The tensioner allows you to adjust the cables easily, ensuring that your brakes and gears function correctly after the handlebar adjustment. Additionally, a tape measure or ruler can be helpful for measuring the exact height change, ensuring that both sides of the handlebars are even.
How to Raise Handlebars on Mountain Bike: Step-by-Step Guide
Preparing Your Bike for Adjustment
Start by placing your bike on a stable surface or work stand to ensure it remains secure during the adjustment. Before you begin, check your bike for any visible damage or wear, especially around the handlebar and stem area. It’s also a good idea to measure the current handlebar height, so you have a reference point for your adjustments. This measurement can be taken from the top of the handlebars to the ground or the top of the stem to the ground. Having this reference helps you track the changes you make and ensures that both sides of the handlebars are adjusted evenly.

Adjusting the Stem and Handlebar Height
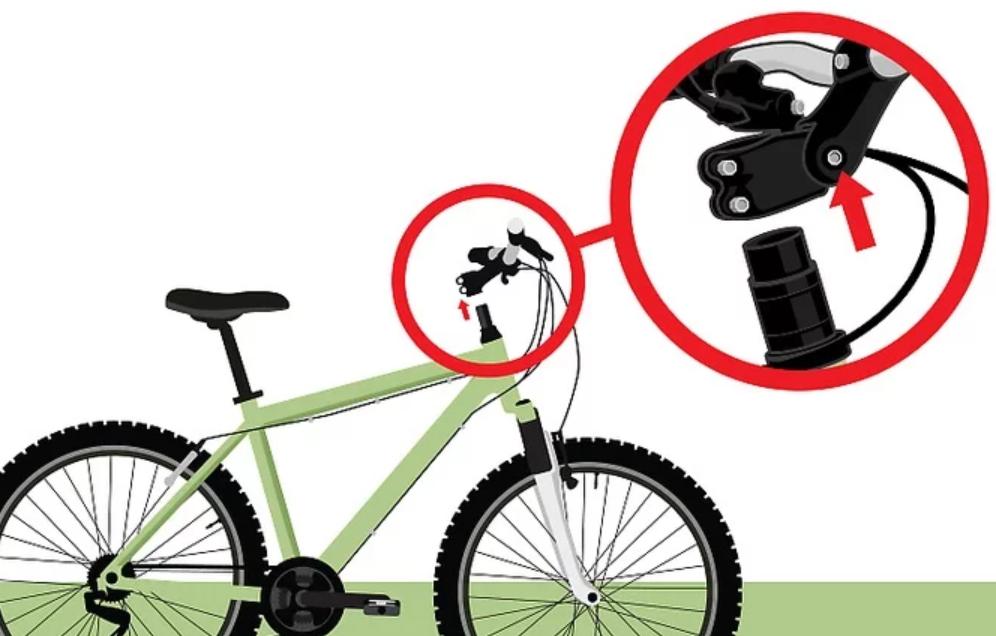
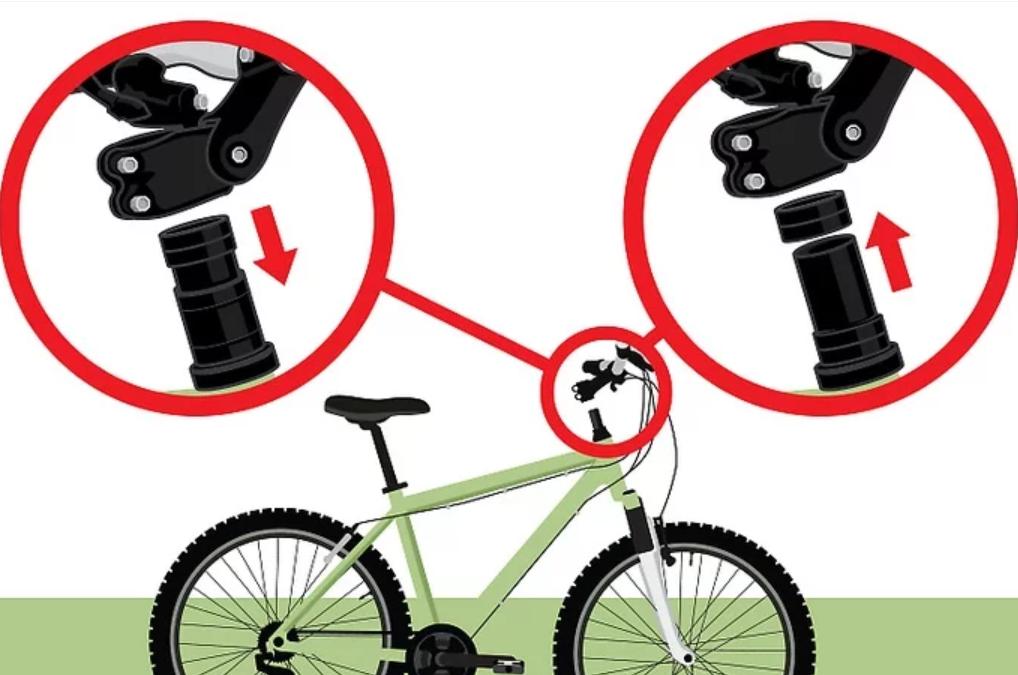
To begin raising the handlebars, locate the bolts that secure the stem to the bike’s steerer tube. These are usually found on the side of the stem and on the top cap. Use the appropriate size Allen wrench to loosen these bolts, but do not remove them completely. Once the bolts are loose, gently lift the handlebars to your desired height. If you’re using a stem riser, now is the time to install it between the stem and the steerer tube. After adjusting the height, retighten the bolts gradually, alternating between them to ensure even pressure. Finally, use a torque wrench to secure the bolts to the manufacturer’s recommended tightness. Recheck the handlebars to ensure they are level and at the correct height before taking your bike for a test ride.
Common Mistakes to Avoid When Raising Handlebars
Over-tightening Screws
One common mistake when raising handlebars is over-tightening the screws. It’s crucial to use a torque wrench to tighten the screws according to the manufacturer’s specifications. Over-tightening can strip the bolts or damage the stem, which can lead to safety issues while riding. Always start by hand-tightening the screws, then gradually use the torque wrench to finish the job. If you’re unsure of the correct torque setting, consult your bike’s manual or seek advice from a bike shop. Ensuring the screws are properly tightened is essential for maintaining the integrity of your bike’s handlebar setup.
Ignoring the Bike’s Geometry
Another mistake to avoid is ignoring your bike’s geometry when raising the handlebars. Every mountain bike is designed with a specific geometry that affects handling and performance. Raising the handlebars too much can alter this geometry, leading to poor handling or reduced control, especially on steep descents. It’s important to make gradual adjustments and test ride your bike after each change to ensure the handling remains comfortable and responsive. Pay attention to how the bike feels during different types of rides, and make further adjustments if necessary. Balancing comfort and performance is key when adjusting handlebar height.
Conclusion
Raising the handlebars on your mountain bike is a simple yet effective way to enhance your riding comfort and control. By following the steps outlined in this guide, you can know how to raise handlebars on mountain bike without professional help. Remember to use the right tools, avoid common mistakes like over-tightening screws, and consider how the changes will affect your bike’s geometry. Taking the time to raise your handlebars correctly will result in a more enjoyable and personalized riding experience. Whether you’re a casual rider or tackling challenging trails, having the right handlebar height can make all the difference. Make these adjustments confidently, and enjoy the improved comfort and control on your mountain bike.
FAQ
Can I raise the handlebars on any mountain bike?
Yes, most mountain bikes allow for handlebar height adjustments, but the method may vary depending on the type of stem your bike has.
How much can I raise the handlebars without affecting the bike’s performance?
It’s best to make small adjustments and test the bike’s handling. Raising the handlebars too much can affect the bike’s geometry and control.
Will raising the handlebars make my ride more comfortable?
Yes, raising the handlebars can reduce strain on your back, neck, and wrists, making your ride more comfortable, especially on longer rides.
