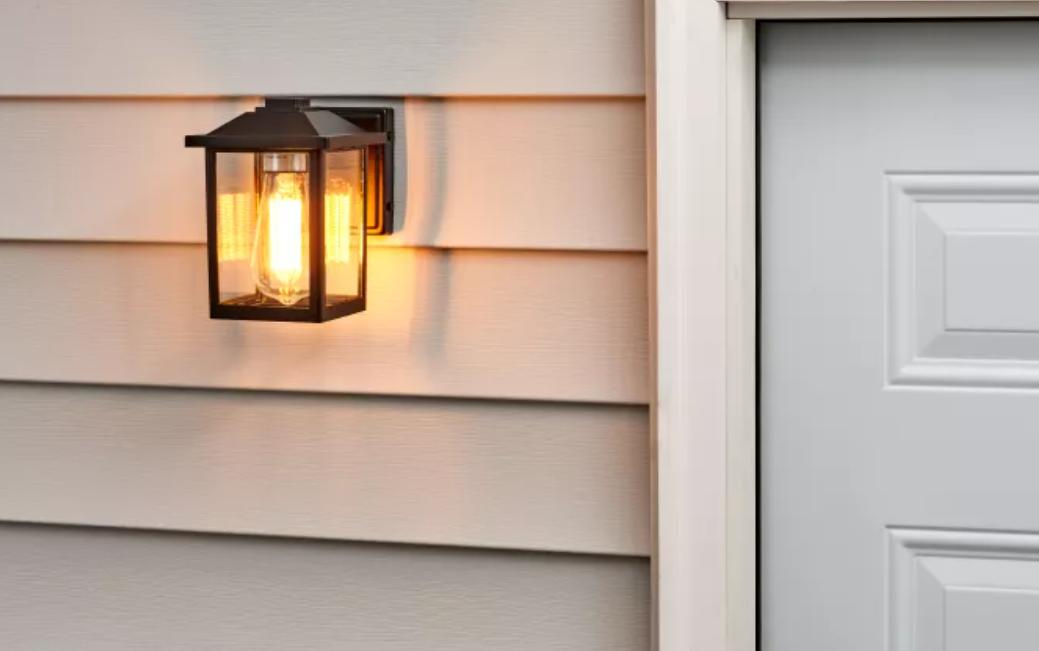
Replacing an outdoor light fixture is a straightforward task that you can handle without professional help. Whether you’re upgrading to a modern design or replacing a faulty fixture, the process is manageable with the right tools and instructions. If you’re wondering how to replace an outdoor light fixture, this guide has you covered. Safety is key, so ensuring the power is off before starting is crucial. In this guide, you’ll learn how to replace your outdoor light fixture properly, avoiding common pitfalls along the way. With patience and attention to detail, you can complete this task efficiently, enhancing the appearance and functionality of your outdoor space. Follow these step-by-step instructions to confidently replace your outdoor light fixture, saving both time and money. This guide will walk you through the tools you’ll need, the proper installation steps, and common mistakes to avoid, ensuring a successful DIY project.

What Tools Do You Need to Replace an Outdoor Light Fixture?
Before starting, gather the essential tools to ensure a smooth replacement process. You’ll need a flathead screwdriver, a Phillips screwdriver, wire strippers, electrical tape, a voltage tester, and a ladder. These tools will help you safely and efficiently remove the old fixture and install the new one. A voltage tester is particularly important to confirm that the power is off, preventing any electrical accidents. Additionally, having the new light fixture and compatible bulbs ready will save you time during installation. Organize your tools and equipment before beginning the process, so you have everything within reach. This preparation will make the replacement process quicker and more efficient.
How to Install the New Outdoor Light Fixture Properly
Step 1: Turn Off the Power
The first and most crucial step is to turn off the power to the outdoor light fixture. Locate your home’s circuit breaker panel and find the switch that controls the power to the area where you’re working. Flip the switch to the off position. To ensure that the power is off, use a voltage tester to check the wires at the fixture. This step is essential to prevent electrical shocks while you work. Double-check the voltage tester reading to confirm that no electricity is flowing to the fixture. Only proceed once you are certain that the power is off. This precaution will keep you safe during the entire installation process.
Step 2: Remove the Old Fixture
After confirming the power is off, it’s time to remove the old light fixture. Start by unscrewing the mounting screws that hold the fixture to the wall or ceiling. Carefully pull the fixture away from the wall, exposing the electrical wires connected to it. You’ll typically see three wires: black (hot), white (neutral), and green or copper (ground). Use a screwdriver to disconnect these wires, and keep the screws and any mounting hardware handy—you might need them for the new fixture. Once the old fixture is completely detached, set it aside. This step prepares the space for your new fixture, ensuring it’s ready for installation.
Step 3: Prepare the New Fixture
Now that the old fixture is removed, it’s time to prepare the new one. Start by reading the manufacturer’s instructions, which will guide you through specific assembly steps if needed. Assemble the new fixture according to the instructions, ensuring all parts are secure. Pay close attention to the mounting bracket, as it will support the fixture on the wall. Check that the fixture’s wiring matches the existing wiring setup—black to black, white to white, and ground to ground. If your new fixture has additional features like motion sensors or a dusk-to-dawn function, ensure they are properly installed and functioning before proceeding.
Step 4: Connect the Wires
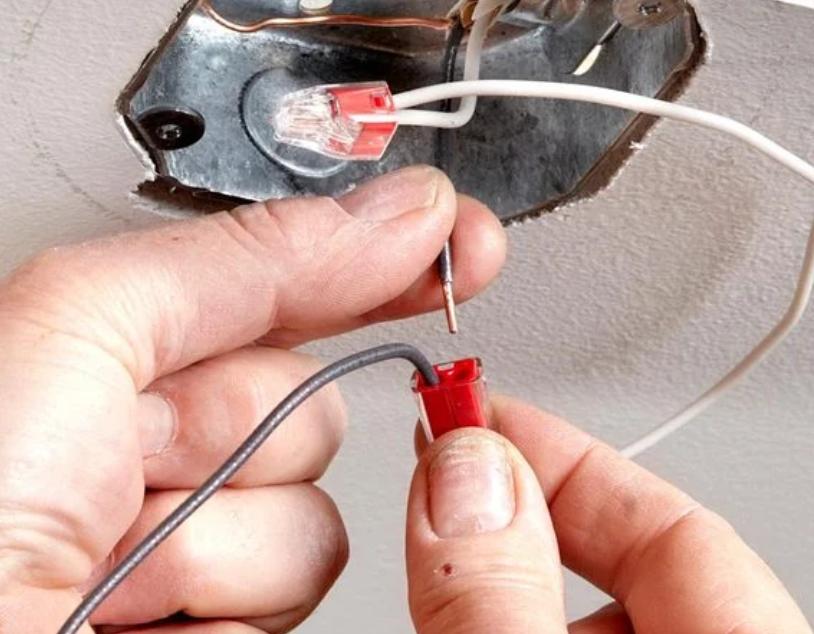
Connecting the wires correctly is critical for the fixture to function safely. Begin by connecting the ground wire from the fixture to the ground wire in the junction box, typically green or bare copper. Next, connect the white (neutral) wire from the fixture to the white wire in the box. Finally, connect the black (hot) wire from the fixture to the black wire in the box. Twist the ends of each pair of wires together and secure them with wire nuts. Wrap the connections with electrical tape for added safety. Ensure that the connections are tight and no exposed wires are showing. This step ensures a safe and reliable electrical connection.

Step 5: Secure the Fixture
With the wiring securely connected, it’s time to mount the new fixture. Align the fixture with the mounting bracket and secure it using the screws provided. Ensure the fixture is level and sits flush against the wall or ceiling. Tighten the screws to hold the fixture firmly in place, but be careful not to overtighten, as this could damage the fixture or wall. If your fixture has a decorative cover or housing, attach it according to the manufacturer’s instructions. Double-check that the fixture is stable and securely attached. This step completes the physical installation of the new fixture, preparing it for final testing.
Step 6: Install the Bulbs and Test
With the fixture securely mounted, the final step is to install the bulbs and test the setup. Choose the correct wattage and type of bulb recommended by the fixture manufacturer. Screw the bulbs into the sockets, ensuring they are snug but not overtightened. Once the bulbs are in place, restore power at the circuit breaker. Flip the switch to turn on the light and check if the fixture illuminates correctly. If the light doesn’t turn on, double-check the wiring connections. Test any additional features, such as motion sensors or timers, to ensure they work as intended. This final step confirms that your new outdoor light fixture is fully operational.
Common Mistakes to Avoid When Replacing Outdoor Light Fixtures
When replacing an outdoor light fixture, it’s easy to make mistakes that can cause frustration or even safety hazards. One common mistake is failing to turn off the power at the circuit breaker, which can lead to dangerous electrical shocks. Another error is incorrectly matching the wires, which can result in the fixture not working or even causing a short circuit. Additionally, rushing the installation process can lead to improperly secured fixtures that may fall or allow water to seep in, potentially damaging the fixture or causing electrical issues. Skipping the step of sealing around the fixture to keep out moisture is another common oversight. To avoid these problems, take your time, follow instructions carefully, and double-check each step as you go.
Conclusion
How to replace outdoor light fixture is a manageable DIY project that can enhance the safety and appearance of your home’s exterior. By carefully following the steps outlined in this guide, you can successfully remove your old fixture and install a new one without needing professional help. Remember to prioritize safety by turning off the power and using the proper tools. Take your time with each step, ensuring that all connections are secure and the fixture is properly mounted. Avoid common mistakes by double-checking your work and testing the fixture before considering the job complete. With the right approach, you’ll have a fully functional and aesthetically pleasing outdoor light fixture that you can take pride in installing yourself.
FAQ
Can I Replace an Outdoor Light Fixture Without Turning Off the Power?
No, you should never replace an outdoor light fixture without turning off the power at the circuit breaker. Working with live electrical wires is extremely dangerous and can lead to serious injury or death from electric shock. Always turn off the power and use a voltage tester to confirm that the wires are not live before you begin any electrical work. Safety should always be your top priority.
What Should I Do If the New Fixture Doesn’t Fit the Existing Wiring?
If the new fixture doesn’t fit the existing wiring, you may need to use wire connectors or extension wires to make the connections. Ensure that any added wires are the correct gauge and properly rated for outdoor use. If you’re unsure about the compatibility or safety of the connections, it’s best to consult an electrician to avoid potential hazards. Proper wiring is crucial for the safe operation of your light fixture.
How Can I Ensure My New Outdoor Light Fixture Is Weatherproof?
To ensure your new outdoor light fixture is weatherproof, make sure it is rated for outdoor use and properly sealed. Apply a bead of silicone caulk around the base of the fixture where it meets the wall or ceiling to prevent water from entering. Additionally, check that the fixture’s housing and bulb covers are secure and intact to protect against moisture and weather.
