Sewing a patch on a jacket is a useful skill for both fashion enthusiasts and those looking to repair or personalize their clothing. Whether you’re adding a pop of color or covering a tear, knowing how to sew a patch correctly can ensure that it stays in place and looks great. This guide will walk you through the process, making it easy for beginners to know how to sew a patch on a jacket. By the end, you’ll be confident in your ability to attach patches securely and neatly, no matter the material of your jacket. Whether you’re sewing by hand or using a machine, the tips provided will help you achieve a professional finish. Let’s dive into the essential steps and materials you’ll need to start sewing patches like a pro.

What Materials Do You Need to Sew a Patch?
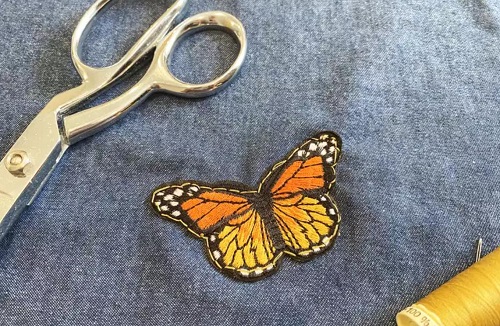
Before you begin sewing a patch onto your jacket, gather all the necessary materials. You’ll need the patch itself, which can be an embroidered design, a fabric piece, or a repair patch. Ensure the patch is clean and flat. Next, select a needle appropriate for the fabric of your jacket—thinner needles for delicate fabrics, and sturdier ones for thicker materials like denim. Thread is another crucial component; choose a color that matches the patch or contrasts nicely, depending on your design preference. A thimble will protect your fingers when hand sewing, especially if you’re working with tough fabric. Finally, have some fabric scissors on hand for trimming excess thread and fabric. With these materials ready, you’ll be well-prepared to start sewing your patch securely.
How to Sew a Patch on a Jacket by Hand
Step 1: Positioning the Patch
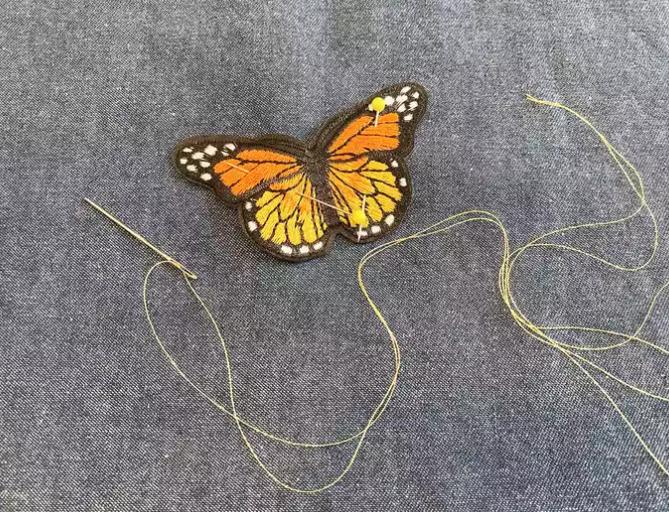
Begin by deciding where to place your patch on the jacket. Lay the jacket on a flat surface, and position the patch in the desired location. Make sure the patch is centered and aligned properly to avoid a crooked attachment. You can use fabric pins to temporarily hold the patch in place, or apply a small amount of fabric glue to secure it before sewing. Double-check the position by trying on the jacket, ensuring the patch looks good when worn. Once you’re satisfied, you’re ready to begin sewing.

Step 2: Stitching the Patch
Thread your needle with a length of thread, making sure it’s long enough to go around the entire edge of the patch. Knot the end of the thread to prevent it from slipping through the fabric. Start from the inside of the jacket, pushing the needle up through the fabric and patch. Use a simple running stitch or a backstitch to sew around the edges of the patch, keeping your stitches even and close to the edge for a neat appearance. Be careful not to pull the thread too tight, as this can cause the fabric to pucker.
Step 3: Securing the Stitching
Once you’ve stitched all the way around the patch, it’s time to secure your work. Bring the needle to the inside of the jacket and make a small knot close to the fabric. For added security, you can pass the needle through the last few stitches again before tying off the thread. Trim any excess thread with your scissors, and smooth out the patch with your fingers. If needed, lightly press the patch with an iron to ensure it lies flat against the jacket. Your patch is now securely attached and ready to show off.

Can You Sew a Patch Using a Sewing Machine?
Yes, you can sew a patch using a sewing machine, which can make the process quicker and more precise. To do this, follow similar steps as hand sewing, but use the machine for stitching around the patch. Ensure the patch is firmly held in place, and choose a straight stitch or zigzag stitch depending on the look you want. Adjust the stitch length to match the thickness of your fabric and patch. Sewing with a machine is ideal for larger patches or when you need a stronger, more durable attachment. However, be mindful of the fabric and needle type to avoid damaging delicate materials.
Common Mistakes to Avoid When Sewing Patches
One common mistake when sewing patches is not securing the patch properly before stitching. If the patch shifts while sewing, it can result in uneven placement or puckering. Always pin or lightly glue the patch in place before you start. Another mistake is using the wrong needle or thread type, which can cause damage to your fabric or patch. Match your needle and thread to the fabric and patch thickness for the best results. Additionally, avoid pulling the thread too tight while stitching, as this can distort the fabric and create an unprofessional finish. Lastly, skipping the step of securing your stitches can lead to the patch coming loose over time. Take the extra minute to tie off and reinforce your stitching for a long-lasting attachment.
Conclusion
Sewing a patch on a jacket is a simple yet valuable skill that can help you repair or customize your clothing. By following the steps outlined in this guide, you can confidently attach patches by hand or with a sewing machine. Remember to gather all necessary materials, position your patch carefully, and avoid common mistakes to ensure a professional-looking finish. Whether you’re adding a touch of personal style or covering up a tear, the techniques you’ve learned will serve you well in your sewing projects. With a bit of practice, you’ll be able to know how to sew patch on a jacket with ease and precision, giving your jacket a unique and durable upgrade.
FAQ
How do I choose the right thread for my patch?
Choosing the right thread is crucial for a seamless and durable patch application. Match the thread color to the patch or the jacket for an invisible finish, or select a contrasting color for a decorative touch. For durability, use a polyester or cotton-wrapped polyester thread, as these are strong and resistant to breaking.
Can I remove and re-sew a patch if I make a mistake?
Yes, you can remove and re-sew a patch if necessary. Carefully use a seam ripper to remove the stitches, being mindful not to tear the fabric. Once the patch is removed, reposition it, and sew it again, taking extra care to secure it properly this time.
What’s the best way to sew patches on delicate fabrics?
When sewing patches on delicate fabrics, use a finer needle and a lightweight thread to avoid damaging the material. Consider using a piece of interfacing on the inside of the fabric to add stability. Hand sewing is often preferable for delicate fabrics, as it allows for more control and gentler stitching.
